Ka Eke ki Wairaka: Level 3–4

This unit focuses on the themes derived from the waiata aroha Ka eke ki Wairaka. The unit has been developed to support teaching and learning at levels three and four of Te Marautanga o Aotearoa.
Ka Eke ki Wairaka
He mea tito nā Puhiwahine
Ka eke ki Wairaka ka tahuri whakamuri
Kāti ko te aroha te tiapu i Kakepuku
Kia rere arorangi te tihi ki Pirongia
Kei raro koe Toko, taku hoa tungāne
Nāku anō koe i huri ake ki muri
Mōkai te ngākau te whakatau iho
Kia pōruatia e awhi-ā-kiri ana.
Kotahi koa koe i mihia iho ai
Ko taku tau whanaunga nō Toa i te tonga
Nō Mania i te uru, ka pēa tāua
I ngākau nui ai he mutunga mahi koe
Kāti au ka hoki ki taku whenua tupu
Ki te wai koropupū i heria mai nei
I Hawaiki rā anō e Ngātoroirangi
E ōna tuāhine Te Hoata, Te Pupū
E hū rā i Tongariro, ka mahana i taku kiri.
Nā Rangi mai anō nāna i mārena
Ko Pihanga te wahine, ai ua, ai hau,
Ai marangai ki te muri e
Kōkiri!
Akoranga 1
Whakarongo

Purpose
To learn and explore the mōteatea Ka Eke ki Wairaka with students.
Learning Intentions
Students are learning:
- The waiata aroha Ka Eke ki Wairaka.
- To explore some of the language used in Ka Eke ki Wairaka.
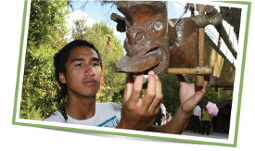
- To use visual art to represent themes in the waiata Ka Eke ki Wairaka.
- To research and present information about Puhiwahine or another female composer.
What You Need
- Ko Wai – Ka Eke ki Wairaka – animated mōteatea and audio file
- Data projector or interactive whiteboard
- Copies of HE RĀRANGI KUPU-A1.PDF (optional)
What You Do
Whole class activity.
- Play the audio track and listen to Ka eke ki Wairaka. Ask students to close their eyes while they listen.
- Ask the students if they have any ideas or feelings about the waiata.
What things did they hear in the waiata?
- Explain:
Ka Eke ki Wairaka is a waiata aroha. It was composed by a woman called Puhiwahine in the early 1840s. Puhiwahine had been visiting Whatiwhati, where she had met and fallen in love with a distant cousin, Mahutu Te Toko. He was a handsome man, as well as a great singer and orator. Puhiwahine and Te Toko spent quite a few days together before her family realised what was going on. They did not agree to this union and whisked Puhiwahine back to the Taupō region. Puhiwahine was distraught and expressed her grief in this waiata aroha.
- Play Ka Eke ki Wairaka again, but this time play just the first two stanzas and play the images as well. Ask the students to carefully listen and look at the pictures.
- After listening and watching the first stanza brainstorm as a class. What words or pictures do you remember? Record a list for display.
Repeat this exercise for each stanza.
Possible list first stanza:
eke
Wairaka
tahuri
tiapu
Kakepuku
rere
arorangi
tihi
Pirongia
Toko
Possible list second stanza:
mōkai
ngākau
tonga
uru
pōruatia
awhi
pea
whanaunga
Toa
Mania
Possible list third stanza:
hoki
whenua tupu
wai koropupū
heria
Hawaiki
Ngātoroirangi
tuāhine
Te Hoata
Te Pupū
Possible list fourth stanza:
hū
mahana
kiri
tongariro
Rangi
mārena
Pihanga
ua
hau
marangai
Explore the text
- Organise the students into groups. Each group works with a word list and researches to provide the following for each word:
- A definition.
- At least one synonym.
- Use in a sentence.
- A context that it could be used in.
- Perform a charade to demonstrate visually meaning.
Print the word lists for groups to work with, or use your own (HE RĀRANGI KUPU-A1.PDF).
If the word is a proper noun ask them to provide further information e.g. Pihanga is a mountain close to Tongariro. She is the wife of Tongariro.
Reinforce the learning
What you need
- Copies of RAUPAPATIA NGĀ KUPU-A1.PDF
- Copies of RAUPAPATIA NGĀ RĀRANGI-A1.PDF
What you do
- Using the key word lists get the students to write the words onto cards, shuffle them and then try and order them – firstly, into the correct stanza, then in the order that they occur in the text. (Or you could use RAUAPAPATIA NGĀ KUPU-A1.PDF.)
- Using RAUPAPATIA NGĀ RĀRANGI-A1.PDF, cut the waiata into lines of texts that the students then sequence. Give each group a different set of lines. Groups present their lines back to the whole class.
Silhouettes

- Play Ka Eke ki Wairaka again. This time ask students to focus on the visual imagery. Discuss how the artist has layered different images and used silhouettes and transparencies to tell the story.
- For this activity, students choose a word, or a line, from the waiata as inspiration for a silhouette picture. (See examples.)
What you need
- Black card
- Camera and printer
- Craft knives
- Glue
What you do
- Students each choose a word or line from the waiata.
-
Students work in pairs and brainstorm images that their words or lines conjure.
e.g. TONGARIRO – puia, hukarere, maunga, Ketetahi, Pihanga, Ngātoroirangi, Tūwharetoa.
- Students take photos of each other to represent their chosen word or line. Get students to think about:
– the shapes they make with their bodies
– the negative area – the area that will be cut out
– profiles, front on or from behind
– close ups, mid-shots or wide-shots
– the background area.
- Students use craft knives to carefully cut out the part of the photograph that will become the silhouette.
- Glue the photograph onto black card. If they have been careful they may be able to use the cut out on another piece of card, or background.
Presenting and viewing


- Students present their artworks to small group or class.
- Students respond to artwork – ask questions; say what they think it represents; say what they like about it; say how it made them feel.
- Artist shares their own ideas about their art piece.
Note
You could also do this activity using magazine pages instead of photographs.
Learning Ka Eke ki Wairaka
Print copies of the text for your students or use the audio track of the mōteatea, (KA EKE KI WAIRAKA.PDF).
- The next task is to learn Ka eke ki Wairaka – a stanza at a time.
- Work as a whole group. Learn the first line of the waiata. When the whole group is confident move onto the second line. Practise just the second line until it is embedded, and then return to the first and sing both lines together. Work in this way to learn all the lines, learning a line in isolation before adding it to the previous lines, and learning a whole stanza before moving to the next.
- Practise the stanzas regularly to embed the learning.
Ngā Mahi a ngā Tūpuna
What you need
- Copies of NGĀ MAHI A NGĀ TŪPUNA-A1.PDF (1 mā ia ākonga)
- He pēne whītau, pene rākau kano rānei
- He kutikuti
What you do
- Give each student a copy of NGĀ MAHI A NGĀ TŪPUNA-A1.PDF.
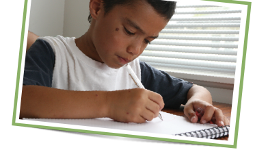
- Read these 9 lines from the waiata to the students, allow a bit of time between reading each line and ask students to draw a quick picture into the table to represent the line read.
Ka eke ki Wairaka ka tahuri whakamuri;
Kei raro koe toko ko taku hoa tūngāne!
Ko taku tau whanaunga nō Toa i te tonga,
Kāti au ka hoki ki taku whenua tupu,
I Hawaiki rā anō e Ngātoroirangi,
E hū rā i Tongariro, ka mahana i taku kiri.
Nā Rangi mai anō nāna i mārena
Ko Pihanga te wahine, ai ua, ai hau,
Ai marangai ki te muri, ē! Kōkiri!
- When you’ve completed reading and the students their pictures, ask the students to the cut their table into the 9 separate pictures.
- Students mix their pictures up and put them in an envelope.
- Give each student a set of the lines you read (NGĀ MAHI A NGĀ TUPUNA-RĀRANGI-A1.PDF), and ask them to swap envelopes with a classmate. Students then try and put the lines to their friend’s pictures.
Possible Assessment Opportunities
Students can:
- Perform the mōteatea Ka Eke ki Wairaka.
- Create an art work inspired by a line from the mōteatea.
- Present their artworks to peers.
- To give and receive comments about artwork (their own and their peers).
Akoranga 2
Ngā Kaitito Wahine

Purpose
To research a female composer from our iwi, (or another).
Learning Intentions
Students are learning:
- To research and present information about Puhiwahine or a female composer from our iwi who lived over 100 years ago.
- To present information in an audio visual or video presentation.
What You Need
- Internet connection
- Sound recording device
What You Do
Ngā kaitito o mua
Arā atu ngā wāhine toa ki te tito mōteatea. I roto i ōna kohikohinga waiata o Ngā Mōteatea ka kī ake a Tā Apirana Ngata ko te nuinga o ngā kaitito he wāhine. Ko tāna meatanga tērā ki ngā tauira reo Māori kia ruku rātou ki ngā waiata nei kātahi ka kitea te wairua ake o te mana wahine.
Kei ngā waiata hoki ngā kōrero ā-iwi, ngā kōrero tuku iho, ngā tohu whenua, ngā kōrero tōrangapū ā-iwi. He tohu tēnei ki te tohunga o te wahine Māori ki te whakaheke kōrero. Ko tētahi kaitito rongonui o te rautau 1800 ko Puhiwāhine o Ngāti Tūwharetoa me Ngāti Maniapoto. E ai ki a Pei Te Hurinui ka rongo i ōna waiata he wahine mātau ia ki ngā kōrero, ngā whakapapa me ngā tohu whenua o tōna iwi; i āta whai whakaaro ia ki ngā tāpaetanga whenua o tōna iwi, me tana whakaōhiti ki tōna iwi kia tūpato ki ngā āhua o te Kāwana me te whakawai o te reti.[1]
- This is a research project. Students are to research either Puhiwahine or another female composer from their own tribe (or from a local tribe) who lived over a hundred years ago.
- As a class research which female composers from the iwi fit the criteria. Students choose a composer they are mostly closely connected to.
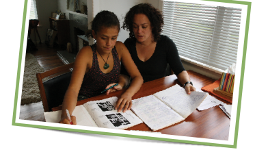
- Students create a research file. Collate text, images and any sound and film files that you think are interesting. Students to create a list of at least five questions to focus their research, e.g:
– Where did she live? (And die?)
– What were her tribal connections?
– What did she look like?
– What was life like for her?
– What waiata did she compose?
– What sort of things did she write about and why?
Helpful sources are:
– Te Ara website
– Ngā Mōteatea
– Ngā Tāngata Taumata Rau
- Students choose a waiata by their composer. Source a copy of the words and a recording of the waiata (or record it being performed).
- From the research notes they have compiled students are to give a short oral presentation about their composer – no longer than 2 minutes. They don’t need to write a speech – just share facts about their composer.
- You could facilitate a Q & A session after every 4 presentations, where students ask and answer questions about the composers who have been presented.
Documentary
Watch this episode of Iwi Anthems – a documentary series on Māori Television. Chris Winitana talks about a number of Tūwharetoa “anthems”, including Ka Eke ki Wairaka. You could watch the whole documentary (26 minutes) or just the section about Ka Eke ki Wairaka (12:50 minutes).
- From the research and media they have compiled, students are to make their own short documentary about their composer.
- They could use iMovie or another video editing programme or PowerPoint to create an audio visual presentation.
- The documentary should answer their initial research questions and be 2–3 minutes in length. It should include:
– Titles and credits
– Narration
– Recordings of waiata (or parts of waiata), images (still and moving)
– Lyrics.
-
Students should storyboard their videos. It will to help organise their information and imagery and give them a “map” to work with when compiling and editing their presentation. Depending on how accustomed your students are to storyboarding, you may need to demonstrate.
Remind them they can use both sketches and notes to help them organise the main ideas in each part of their storyboard.
- In pairs, students share their storyboards. They should both give feedback on the storyboard e.g. could they follow the storyline; were the key ideas clearly presented.
- Using their storyboards to guide them, students compile and edit their presentations.
- As a class, view the documentaries.
Composers of the last century
What you need
- Ko Wai – Ka Eke ki Wairaka animated mōteatea
- Internet access
- Copies of PAPAPAKI-A2.PDF
- Sound and video recordign equipment
- Video editing tools
What you do
- As a class share thoughts and knowledge about female, Māori, composers of the last 100 years.
Ka haere tonu ngā mahi a ngā kaitito wahine toa i te momo tangata pērā i a Tuini Ngāwai me Ngoingoi Pēwhairangi. I te tekau tau 1980 ka tuhi a Pēwhairangi i ngā waiata rongonui pērā i a ‘E Ipo’ me ‘Poi E’ i waiatatia e Tui Teka me te Karapu Māori o Pātea.
I ngā tau tīmatanga o te rautau 2000 ko Whirimako Black, rātou ko Moana Maniapoto, ko Maisey Rika mā ērā i whakatairanga ake i te pūoro Māori me te mana wahine.[2]
Tae noa mai ki tēnei wā ko Toni Huata rātou ko Majic Paora, ko Ariana Tikao, ko Mina Ripia ētahi o ngā wāhine Māori e tito waiata ana i roto anō i te reo Māori. Heoi anō ko Anika Moa, Bic Runga, Betty-Ann Monga me te huhua tonu o ngā wāhine Māori e tito waiata ana, e waiata ana i roto i te reo Ingarihi.
- Watch the video of Ka Eke ki Wairaka. Search Youtube for some of Maisy Rika’s waiata:
Rūaumoko – https://www.youtube.com/watch?v=yvFD3aILwZU
Tangaroa Whakamautai – https://www.youtube.com/watch?v=yblB87dpJGc
-
Talk about music videos and how the video of Ka Eke ki Wairaka is like a music video i.e. that the waiata is supported with moving imagery. Ask:
What makes a good music video?
- Students work in groups. They are to choose a mōteatea that they know or have been researching, and create a “music video” for it.
- They should look at the lyrics and brainstorm imagery that would be appropriate. Some things they could include:
– Video footage that they have shot
– Photographic imagery
– Text
– Artwork they have created.
- Students should create storyboards for their video. This will help them organise what each part of the video requires. They could use this A3 storyboard template, PAPAPAKI-A2.pdf.
- As a group, work to their storyboard, collate and edit sound and imagery.
- View the documentaries as a class. Facilitate session with filmmakers, and audience asking and answering questions and giving and receiving feedback.
- Organise a short film festival and invite whānau and local iwi or kaumātua to come see the documentaries.
Possible Assessment Opportunity
Students can:
- Speak about a female composer from their iwi who lived over 100 years ago.
- Research and produce a short documentary about a female composer from their own iwi, (or Puhiwahine).
- Work cooperatively with peers to make a music video for a mōteatea that they know.
- View and respond to the documentaries and music videos produced by their peers.
Akoranga 3
Waiata Aroha

Purpose
To produce a play based on the mōteatea, Ka Eke ki Wairaka.
Learning Intentions
Students/we are learning to:
- Develop ideas from the waiata aroha, Ka Eke ki Wairaka, and produce a play.
- Understand characters and consider specific vocabulary that they might use.
- Consider the same scenario occurring in different times e.g. in the 1840s, now and in the future.
What You Need
- A recording device
- Copies of KA EKE-MEI RAHI-A3.PDF (1 per student)
- Ko Wai – Ka Eke ki Wairaka – animated mōteatea or audio file
What You Do
- Listen to the waiata aroha again. Use KA EKE-MEI RAHI-A3.PDF and read the words of Mei Rahi te Kiore – the waiata that Mahutu Te Toko wrote in response to Ka Eke ki Wairaka.
- Discuss both the waiata. Explain:
Puhiwahine composed this waiata aroha about Mahutu Te Toko, of Tainui. They were lovers, but Puhiwahine’s brothers strongly objected to the relationship. They came and took here from Whatiwhatihoe, where she had been staying with Te Toko, back to her people in Taupō. Puhiwahine was distraught and wrote this waiata in response.
- Students are to work in groups of four to create a play based on the story of Puhiwahine and Te Toko. The main characters are to be: Puhiwahine, Te Toko and Puhiwahine’s brothers. The focus should be on the dialogue between characters.
- Split the groups so that some are setting their plays in Puhiwahine’s time and some are being set in these times.
- Give students these prompts:
Puhiwahine
You are Puhiwahine. Your brothers want to split you and Te Toko, and take you back home, to Taupō. You don’t want to go.
What would you say to them to convince them to let you stay? What will you say to Te Toko?
Te Toko
You really want Puhiwahine to stay. You love her. What would you do and say to try and convince her brothers to let her stay with you? What will you say to Puhiwahine?
Ngā tūngāne
You have heard that Puhiwahine has fallen in love with Mahutu Te Toko. Your family have sent you to retrieve her, they are strongly against the union. What will you say to Puhiwahine to convince her she must return home with you. What reasons will you give? What will you say to Te Toko?
- Give students a time limit and get the groups to stage their play for the rest of the class.
Possible Assessment Opportunity
Students can:
- Work cooperatively and quickly to stage a dialogue between characters based on the story of Puhiwahine and Mahutu Te Toko.
Akoranga 4
Te Whakapapa o Ngātoroirangi

Purpose
To learn the whakapapa of Ngātororangi, and the line of descent to Tūwharetoa.
Learning Intentions
Students/we are learning:
- The story of Ngātoroirangi.
- To memorise and recite Ngātoroirangi’s whakapapa.
What You Need
- Copies of TE KĀWAI WHAKAHEKE-A4.PDF (1 per student)
- The book Ngātoroirangi, nā Hēmi Te Peeti, item number 10789
What You Do
Ngātoroirangi was the ancestor responsible for hailing volcanic fire from Hawaiki to the Central North Island Volcanic Plateau. He was the tohunga aboard the Te Arawa waka, although he was originally designated that role aboard Tainui waka. He is an ancestor of Ngāti Tuwharetoa.
- Read the story of Ngātoroirangi.
- Encourage students to explore the story and use some of the interactive elements to find out more. Facilitate a class discussion, and find out what they know.
- Using TE KĀWAI WHAKAHEKE-A4.PDF, cut out the names of the tūpuna, mix them up, put them in envelopes, and give each student an envelope.
- Teacher recites the whakapapa and students order their tūpuna names as they hear them. When they’ve sequenced them correctly, students learn the whakapapa so that they can recite it aloud.
Ko Pūhaorangi
Nāna ko Ohomairangi
Nāna ko Ruamuturangi
Nāna ko Taunga
Nāna ko Atuamatua
Nāna ko Rakauri
Nāna ko Ngātoroirangi
Nāna ko Tangihia
Nāna ko Tangimoana
Nāna ko Kahukura
Nāna ko Rangitakumu
Nāna ko Mawakenui
Nāna ko Mawakeroa
Nāna ko Mawaketaupō
Ka moe i a Haahuru
Ka puta ko Tūwharetoa
- Students can work in pairs to test each other’s recitation of the whakapapa.
Possible Assessment Opportunity
Students can:
- Memorise and recite Ngātoroirangi’s whakapapa.
Akoranga 5
Waiariki

Purpose
To learn some traditional theories about the origins of the geothermal activity in the Central North Island.
Learning Intentions
Students/we are learning:
- To locate areas of geothermal activity in the Central North Island.
- The role of Ngātoroirangi’s sister Te Hoata and Te Pupū in bringing volcanic fire to the Central North Island’s volcanic plateau.
What You Need
- He pikitia o te mahere whenua o te ao
- He tārua o TE AU MOKO-A5.PDF (1 mā ia ākonga)
- Te pukapuka Ngātoroirangi, nā Hēmi Te Peeti, nama take 10789.
What You Do
Te Hoata rāua ko Te Pupū
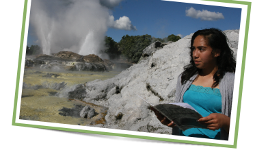
It was Te Hoata and Te Pupū who sent the hot water, mud pools, volcanoes and geysers from Hawaiki to save their brother Ngātoroirangi from perishing on the bitter, cold, flanks of Tongariro. Puhiwahine acknowledges them in her waiata.
According to scientists it is movement of tectonic plates that causes earthquakes and volcanic activity in certain areas. Friction causes heat to build up beneath the mantle which in turn forces magma to the surface.
- Give each student a copy of the map of the North Island.
- that relates to the path Te Hoata and Te Pupū took in reaching Ngātoroirangi (pages 13–16).
- Students mark and name the places they hear on their map. They can add in any other geothermal areas they know of.
- Students create a ‘key’ for their map (e.g. with colour) to show volcanoes, geysers, mud pools etc.
- Students could use the internet or atlases to help.
- Then get students to look at ‘te au moko o te whenua’ section of the New Zealand Historical Atlas.
- As a class discuss what they’ve discovered about ‘te au moko o te whenua’.
Te Puia
Explore the science behind geysers through some hands-on activities. One of the main scientific elements in geysers is pressure. These experiments focus on how pressure works and its effect on objects.
Science experiments provide the students with opportunities to:
- Use descriptive language when talking about their observations
- Share their ideas with their fellow scientists
- Use words and phrases appropriate to context and topic
- Present their findings back to the class.
Students work in pairs.
Water Pressure in a Bottle
What you need
- A sink or tub (or you could do this activity outside)
- A clear 1 or 2 litre bottle
- A thumb tack or skewer
- A funnel
- A jug of water
What you do
- Use the thumb tack to poke a small hole in the 2L bottle.
- Remove the thumb tack from the bottle and pour water from the jug into the bottle. When the water level in the bottle rises above the small hole. You will notice a slight trickle of water will escape the bottle into the tub.
- Next put the funnel into the bottle and pour more water in through the funnel. As more water is poured in the pressure increases and the water shoots out of the hole.
- Notice how the water trickles out as the water level gets closer to the hole.
- Ask students to say what they think is happening.
The more water was in the bottle the greater the pressure became, forcing the water out of the small hole much faster.
Breathing Balloon
This simple activity demonstrates that when the bottle is squeezed, the pressure causes the air in the bottle to move to the only available space: an expandable balloon.
What you need
- An empty plastic water bottle
- A balloon
What you do
- Stretch the opening of the balloon over the opening of the bottle. Squeeze the bottle to make the balloon stand straight.
Balloon in a Bottle
What you need
- Empty 1 or 2 litre plastic bottles (1 per student)
- Balloons (1 per student)
- Thumb tack or skewer
- Scissors
What you do
- Students work in pairs. They poke a hole in the bottom of one of the bottles.
- Students place the balloons inside the bottle and stretch the balloon opening back over the bottle opening.
- First, try to blow up the balloon in the bottle with a hole.
- Then, try blowing up the balloon in the bottle with no hole.
- Students will find that the bottle with a hole in it made it easy to blow up the balloon, whereas blowing up the balloon in the bottle with no hole proves to be almost impossible.
- Ask pairs what they thought was happening.
- Talk about displacement and how, without something like a hole through which air could escape, more air couldn’t easily be added to an enclosed space.
When a balloon is blown up, air is moved into a compressed space to inflate it and the air outside the balloon moves to allow the balloon to get bigger. However, when the balloon is placed inside a bottle, the air can’t and allow the balloon to get bigger. If you make a hole in the bottle, it will blow up because the air around the balloon can escape.
Paper Bag Explosions
This is an outside activity.
What you need
- Paper bags
- Flour
- ¼ cup measure
What you do
- Put a ¼ cup of flour into in the bag and gently blow up like a balloon.
- Holding the neck of the bag tightly, smack your other hand onto the bag – popping it. Observe what happens to the flour.
The force of your hand when it smacks the bag, pushes against the air in the bag, and forces it to explode out – you can see how the air in the bag reacts because you can see the flour dust flying everywhere.
Mentos and Diet Coke Geysers
This activity is best demonstrated outside and by the teacher – mainly because of the expense of buying the coke and the mentos. It is a magnificent demonstration of how a chemical reaction can cause a buildup of pressure.
https://www.youtube.com/watch?v=ZwyMcV9emmc
What you need
- 2L of Diet Coke
- a sleeve of Mentos mints
What you do
Carefully and quickly drop all the Mentos into the Diet Coke bottle, run to safety and watch a huge geyser spray out!
- Students could vary the experiment by:
– testing a range of different sodas
– using varying numbers of mentos
– using different types of mentos or sweets.
- They could record results and compare findings.
- Filming the reactions is a good way to be able to share each other’s findings.
Geyser Eruption
You could set up tables outside to conduct these experiments.
You will need
- A filled water bottle
- Several tablets of alka-seltzer (or any antacid tablets)
- A tub to catch any splashes
What you do
- Crush up two tablets, quickly dumping them into a water bottle, and holding your hand completely over the bottle’s opening allowing pressure to build up.
- Count to five, move your hand away – a modest geyser explosion should occur.
- Try and determine what combination of factors creates the most impressive geysers. Experiment using variables such as:
– The size of the bottle
– The number of Alka-Seltzer tablets
– The length of time you allow pressure to buildup.
- Ask students to draw conclusions about the experiments they tried.
Possible Assessment Opportunities
Students can:
- Locate geothermal areas in the central North Island plateau, including volcanoes.
- Explain some of the features of volcanic activity around the Central North Island Plateau.
- Make statements about how pressure and chemical reactions can cause explosions.
[1] Rawinia Higgins rāua ko Paul Meredith. 'Te mana o te wāhine – Māori women - Waiata, karanga and whaikōrero', Te Ara - the Encyclopedia of New Zealand, updated 30-May-14
URL: http://www.TeAra.govt.nz/en/te-mana-o-te-wahine-maori-women/page-4
[2] Rawinia Higgins rāua ko Paul Meredith. 'Te mana o te wāhine – Māori women - Waiata, karanga and whaikōrero', Te Ara - the Encyclopedia of New Zealand, updated 30-May-14
URL: http://www.TeAra.govt.nz/en/te-mana-o-te-wahine-maori-women/page-4


