Rūaumoko: Level 1–2

RŪAUMOKO
This unit utilizes the haka taparahi, Rūaumoko, as a focus for learning, and exploring aspects of the text. It links to the Reo Māori, Tikanga ā-Iwi, Hangarau and Ngā Toi learning areas, supporting teaching and learning at levels 1– 2 of Te Marautanga o Aotearoa.
The activities have been designed to create oral language opportunities – both formal and informal.
Rūaumoko
He haka taparahi nā Mohi Tūrei i tito, nō Te Aitanga-a-Mate me Ngāti Hokopū
Ko Rūaumoko e ngunguru nei!
Hi Au! Au! Auē ha!
Ko Rūaumoko e ngunguru nei!
Hi Au! Au! Auē ha!
I aha aha
E ko te rākau a Tūngāwerewere! I ahaha!
He rākau tapu nā Tūtaua ki a Uenuku
I patukia ki te tipua ki o Rangitopeka
Pakaru te upoko o Rangitopeka
Patua ki waenganui o te tau ki Hikurangi,
He toka whakairo e tū ake nei
He atua! He tangata! He atua! He tangata, ho!
He atua, he atua, tau Paretaitoko
Kia kitea e Paretaitoko te whare haunga
I ahaha!
Kia whakatetē mai ō rei, he kurī! Au!
I ahaha!
Nā wai i parehua taku hope kia whakakā i te rangi
Kia tare au! Hī!
He roha te kawau! Hī!
Kei te pou tara
Tū ka tetē, ka tetē! Tau hā!
Ko kōmako, ko kōmako!
E ko te hau tapu
E rite ki te kai nā Matariki
Tapa reireia koi tapa!
Tapa kononua koi ana tukua!
I auē hī!
I ahaha
Ka tū te ihiihi
ka tū te wanawana
Ki runga i te rangi
E tū iho nei, e tū iho nei
Hī!
Akoranga 1
Whakarongo

Purpose
To introduce, listen to, and discuss the haka taparahi Rūaumoko with students.
Learning Intentions
Students are learning:
- To recite the haka and pronounce words correctly.
- To express their feelings about the haka taparahi Rūaumoko.
- To share what they already know about haka.
- To listen to Rūaumoko and share their ideas about the haka.
What You Need
- Ko Wai – Rūaumoko – animated mōteatea and audio file
- Data projector or interactive whiteboard
- Cushions or pillows (optional)
What You Do
Suggestion – teach first thing in the morning. The following material is designed to be spread over a number of sessions – break it up where it suits you and your students.
- Use the Rūaumoko audio track. Ask your students to close their eyes. Play the audio track and listen to the entire haka.
- After listening to Rūaumoko ask these questions:
– What feelings did you get when you listened to this haka?
– Did anything happen to you when you were listening?
Possible answers:
– It made my heart beat faster.
– I felt like jumping up.
– I felt like doing a haka myself.
- Talk about the haka taparahi. Find out what they know already:
– Do they know this haka?
– Have they heard this haka before?
– Where have you heard it performed?
– Do you know where it comes from?
- Explain:
Rūaumoko is a famous haka taparahi from the East Coast. Mohi Tūrei from Ngāti Hokopu and Te Aitanga-a-Mate is said to have composed this haka. However, there are stories told, that Rūaumoko was first performed over 400 years ago by the brothers Ngā Kuri Paaka – Kuku, Korohau and Rongotangatake – at Haunui Pā, in the Makarika Valley.
Listening and Viewing
- Play Rūaumoko again, but this time show the pictures that go with the text.
- Ask students:
– What are some of the main ideas in this haka?
Possible Answers:
– Rūaumoko
– Atua
– Tāngata
– Ngāti Porou
- Ask students:
– What are some of the words you remember hearing?
You could listen to the haka in parts and record word lists as you go.
These are some possible lists.
Rūaumoko
Uenuku
tipua
upoko
patua
Hikurangi
atua
tangata
Paretaitoko
whare
haunga
kurī
hope
rangi
kawau
pou
kōmako
hau tapu
kai
Matariki
Vocabulary Activities
Syllable Hop
- Use the class word lists.
- Explain that everyone will hop in time with the syllables of a word.
- Remind them what syllables are and model the activity quickly.
- Depending on your students, this could be a shadow activity – you say the word, model it, and then have them copy what you did.
Syllable Clap
Same as above, but use clapping instead of hopping.
Syllable Number Run
- Take this game outside.
- Place a 1 in one area, a 2 in a different area, and a 3 in a third area.
- Shout a word and have them run to the number that represents the correct amount of syllables.
- Say the word slowly, broken down into syllables, to help them to self-correct.
- Make some word cards from your class word lists.
- Students stand up.
Stand Up and Shout it!
Teacher:
SAY the WORD and SHOW the WORD CARD.
Students and teacher:
REPEAT IT
SHOUT IT
WHISPER IT
CLAP IT
STAMP IT
CHEER IT!
Do this for all the words.
- Use the word lists above or the ones you have created as a class with the following activities:
Hangman
Either in pairs, small groups or as a whole class.
Crosswords
Use this link and the lists you have made as a class to create crosswords.
http://www.education.com/worksheet-generator/reading/crossword-puzzle/?gclid=CKbXjuq4wcwCFcOSvQoda4wBQw&gclsrc=aw.ds
Word searches
Use this link to create word searches from your vocabulary lists.
http://www.education.com/worksheet-generator/reading/word-search/
Ako ā-Kākā
- Learn the text to the first and last stanzas of Rūaumoko. You could add in the other stanzas if you and your students are confident.
- Watch Haka Documentary - Haka Taparahi o Ngati Porou https://www.youtube.com/watch?v=gRapTjP4TLk
Possible Assessment Opportunities
Students can:
- Listen to and watch the haka Rūaumoko.
- Understand and explore some of the language in Rūaumoko.
- Recite the words to the first and last stanzas of Rūaumoko.
Lesson 2
Rūaumoko – the God
Purpose
To learn and explore the story of the atua Rūaumoko.
Success Criteria
Students are learning:
- The story of Rūaumoko
- To use a storyboard as a device to retell a story.
- To make and stage a puppet theatre based on the story of Rūaumoko.
What You Need
- A copy of the story – RŪAUMOKO-PŪRĀKAU-A2.PDF
- A4 paper
- Coloured pencils, crayons, felt pens
Ngā Mahi
The pūrākau
- Tell the story of Rūaumoko to your students. (Use RŪAUMOKO-TE ATUA-A2.PDF.)
- Generate a class discussion about the story and brainstorm the main ideas.
Possible ideas:
– Atua
– Rangi and Papa
– Rūaumoko
– Separation of Rangi and Papa
– Earthquakes
– Volcanoes
– Baby
– Pōtiki
– Sadness
– Floods
– Bad weather
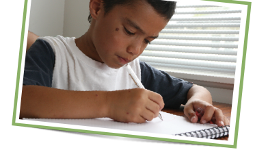
- Students are to use a storyboard to retell the main ideas of the pūrākau. Explain that a storyboard uses pictures to sequence a story. It is really useful for storytelling and playwriting.
- Students choose four main ideas to represent in their storyboard. For example:
– The separation of Rangi and Papa
– Rūaumoko and his mother
– Fire
– Earthquakes
- Students fold a sheet of A4 twice to make 4 small boxes. They then draw their four main ideas into each box. You decide how long they can work on their drawings, but keep it fairly short.
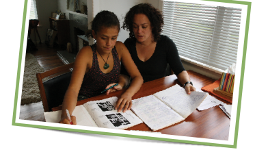
- Working in pairs, students show each other their storyboards and explain what each part is representing. Encourage the listeners to ask questions or offer their ideas about their friend’s storyboard.
Making a shadow theatre
This activity may be more suited to level 2 students, (or buddy-up younger students with older students in the class, or kura).
Shadow theatre
- Introduce shadow puppet theatre to your students.
Use the key words “shadow puppet theatre” and search YouTube for videos – there are some really great examples, both simple and complex; long and short.
This link is to a video produced by The Learning Connexion in Wellington with video instructions in English.
https://www.youtube.com/watch?v=aOInvDdMFNE
This one, from York Theatre Royal, also provides video instructions without spoken English.
https://www.youtube.com/watch?v=pSVd_0AKTKc
- This link provides instructions for making a shadow puppet theatre. Organise students into groups and get them to make their own theatre, which they will use to create their own puppets and show based on the story of Rūaumoko. https://kidspot.co.nz/activities/make-a-shadow-puppet-theatre/
What you need
- 1 cardboard box
- 1 sheet of tissue paper (large enough to cover one side of your box)
- Tape
- Scissors or a craft knife
- Black marker pen
- A lamp or large torch
- A table
- Watch the Hey Diddle Diddle shadow puppet show here. There are instructions and printable puppet templates. Make this a starter project, replacing the English with the Māori version of Hei Tira Tira.
What you do
https://kidspot.co.nz/activities/make-hey-diddle-diddle-shadow-puppets/
Hei tira tira
Te poti me te whira
Te kau hupeke te marama e
Katakata te kurī
I tana mahi pai
Ka oma te rīhi me te pune …
Rūaumoko shadow theatre

- Each group is to create a shadow theatre piece based on the story of Rūaumoko and stage it for the class or a wider audience.
-
Groups use a storyboard made in the first activity to develop their story. They can write 2 or three sentences as narrative or create dialogue for each part of their storyboard.
This becomes the script for their theatre piece.
- Reuse the “theatres” created in the previous activity. Students make puppets for characters in the Rūaumoko story. (See previous activity for links to instructions.)
Groups can create “sets” for each scene e.g. fire, trees, clouds, rain.
Making the puppets
What you need
– Black card
– Scissors and or a craft knife
– Bamboo skewers
– Tape
What to do
– Draw outlines of your characters/puppets on the black card and then cut them out – the more interesting your shapes the better.
– Tape a bamboo skewer to one side of the puppet.
(See previous links.)
Staging the show
- Organise the group so that everyone has a role – puppeteers, director, sound and lighting.
- Put the puppets between the light and the screen. Experiment with distances from the screen. Experiment with different coloured lighting.
- Groups rehearse their plays and then perform them to the wider class or invited audience.
Extension ideas
- Make a video of the show.
Other resources
Use He Manu Tuhituhi to develop whakaari, in particular He Tuhinga Whakangahau (pages 35–58) and the supporting teacher’s material in He Kura Tuhituhi me He Manu Taketake: he pukapuka aratohu mā te pouako (pages 159–183).
He Manu Tuhituhi PDFs available:
Possible Assessment Opportunities
Students can:
- Create a story board and use it to retell the story of Rūaumoko.
- Use their storyboard to help write a script for a shadow puppet theatre about Rūaumoko.
- Work cooperatively to make and stage a shadow theatre based on the story of Rūaumoko.
Akoranga 3
Haka

Purpose
To create actions for two mini haka.
Learning Intentions
Students are learning:
- To share what they know about Rūaumoko.
- To recite the first and last stanzas of Rūaumoko and perform them as mini-haka.
- To choreograph actions for the mini-haka.
- To recognize the differences between male and female pūkana.
What You Need
- Copies of the worksheet – KO RŪAUMOKO AU.PDF (one per student)
What You Do
Ko Rūaumoko Au
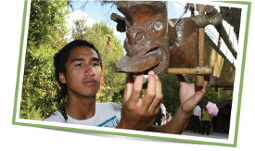
- Display a big image of Rūaumoko on the walls as a focus for this unit.
- What do we already know about Rūaumoko, both from the story we’ve heard and from our collective knowledge? Brainstorm as class and write up the ideas for display. Make a class word list and display ‘RŪAUMOKO WORDS’ on the wall.
-
Make personal profiles – as if each student were Rūaumoko.
From the things they know already – stories and information, and pictures they’ve seen – get them to think about:
– What would it like to be Rūaumoko?
– What would you be like?
– What would you do?
– How would you feel?
- Using the sheet KO RŪAUMOKO AU-A3.PDF, students complete the sentences. Remind them that they can refer to the class word list if they need to.
- Once completed, the students share their Rūaumoko profile with the class (or smaller group). Display the profiles on the Rūaumoko focus wall.
E ngunguru nei
- As a class, watch Haka Documentary - Haka Taparahi o Ngati Porou https://www.youtube.com/watch?v=gRapTjP4TLk
E Ngunguru nei
Ko Rūaumoko e ngunguru nei!
Hi au! Au! Auē hā!
Ko Rūaumoko e ngunguru nei!
Hi au! Au! Auē hā!
Hi!
- This is the first verse of the haka taparahi Rūaumoko. Teach it as a mini-haka to your students.
- Discuss how and why haka are composed and performed. Have the class practise the words and actions together until they feel confident.
-
Discuss how haka uses the whole body including the eyes, mouth and tongue. Explain:
For this haka we will concentrate on our feet and legs. We are going to push against the earth in the way that Rūaumoko pushes against Papatūānuku from time to time.
-
Organise the class into small groups (up to 5 students). Students focus on what their feet and legs are doing.
Challenge – Each group works cooperatively to come up with feet/leg movements that cause the ground to shake.
- Allow them time to practise, then bring groups back together to perform to each other.
Pūkana
- Introduce pūkana to the class and show some pictures of both women and men doing the pūkana. Generate a class discussion about pūkana. Ask:
– What do you notice about a man’s pūkana?
– What do you notice about a woman’s pūkana?
– What is the difference between a man’s pūkana and a woman’s pūkana?
- Show the pictures you have found of male and female pūkana – include people of all ages, especially children.
- Ask students to write down words they think of when they look at these pictures. Students share words in pairs or small groups.
- Play the Pūkana Game.
The Pūkana Game
- Ask the students to stand in a circle facing inwards. Explain how the game is played:
– You begin with everyone looking down at the ground. This position is ‘raro’, and whenever you call out ‘raro’ everyone looks down.
– When you can see that all eyes are downcast call out ‘runga’.
– As you call ‘runga’ everyone immediately looks at someone in the circle. If the person they are looking at is looking at someone else, the player can remain in the game.
– However, if two are looking at each other, they must say ‘Pūkana!’ and pūkana at each other before stepping out of the circle.
– The last two in the circle win and the teacher and all the rest of the class have to say ‘Pūkana!’ and pūkana at them.
Ka Tū
I auē hī!
I a ha hā
Ka tū te ihiihi
Ka tū te wanawana
Ki runga i te rangi
E tū iho nei
Hī!
- Learn the final verse of Rūaumoko as a second mini-haka. This verse is all about strong feelings – passion, terror, fear and awe.
- When the group is confident with the words and the actions, organise the class into small groups (up to 5 students).
-
This time ask the students to focus on their facial expressions – in particular, pūkana.
How do they use their eyes and mouths to express such strong emotions? - Show them pictures and clips of pūkana being performed by both men and women, to remind them of the difference.
- Allow them some time to practise their haka with pūkana, before groups perform their haka to each other.
Flash Mob Haka
- Choose a couple of flash mob haka clips from Pinterest or YouTube and show the class. Talk about the power of haka to stop people (and traffic) in their tracks.
This clip begins with Te Kapa o Pango Haka and runs into Ka Mate. https://www.youtube.com/watch?v=IYpKHySqIpQ
- Facilitate a discussion around what they saw, heard, thought and felt while they were watching it.
Explain:
As a class we will be doing a flash mob haka at school during the next lunch break.
- Decide where in the kura to stage the flash mob haka and where they might be sitting or standing when the flash mob haka begins. Choose someone to start the haka off.
- Practise in the classroom (or somewhere more private like the school hall) until they are confident and excited.
- At the next lunch break (or next whole school break) do the flash mob haka where they perform both mini-haka with ground-shaking, tongue-poking, eye-googling action!
- Film the flash mob haka for them to watch later.
Possible Assessment Opportunities
Students can:
- Perform the first and last stanzas of Rūaumoko as mini-haka.
- Work cooperatively to choreograph their mini-haka as a flash mob haka and perform it during a lunch break at kura.
- Create a profile about the atua Rūaumoko and share their ideas about Rūaumoko with their peers.
Akoranga 4
Rūaumoko – god of volcanoes and earthquakes

Purpose
To conduct some science experiments that demonstrate eruptions and the properties of lava.
Learning Intentions
Students/we are learning:
- About simple chemical reactions that cause eruptions or explosions.
- To conduct experiments to demonstrate eruptions.
- Follow simple instructions to carry out experiment and bake a Lava Mug Cake.
- To work cooperatively to carry out experiments.
- To share their scientific ideas.
- To use art to express their ideas about volcanoes.
What You Do
Maunga Puia I

Following are three science activities – making volcanoes. The first is a Lemon Volcano, the second is an Ice Volcano and the third is a Glow in the Dark Lava Flow.
Lemon Volcanoes
Working in pairs, students will listen to and follow instructions in the order that you give them.
What you need
- 2 lemons per volcano
- Baking soda
- Food colouring or liquid watercolours
- Stirrer
- Dishwash liquid
- Sharp knife
- Tray
- Cup and spoons
What you do

|

|

|

|
- Slice off the bottom of your lemon so that it sits flat.
- Slice the top out of the other end of the lemon and scoop out a core
- Cut your second lemon in half and juice it. Pour juice into a cup and set aside.
- Place your cored lemon on a tray. Use your craft stick to squeeze the flesh inside the lemon (make sure all the juice stays in the lemon).
- Place a few drops of food coloring or liquid watercolors in the center of the lemon.
- Add a squeeze of dishwash liquid to the lemon.
- Add a spoonful of baking soda into the lemon. It should start to fizz. Take your craft stick and stir the lemon. It should start foaming as you stir it!
- To keep the reaction going add more baking soda, coloring, dish soap and the reserved lemon juice to the reaction. Squeezing the lemon to release the juices also enhances the reaction.
The Science Behind Lemon Volcanoes
- Lemon juice contains citric acid which mixes with baking soda (sodium bicarbonate) and reacts to form carbon dioxide and sodium citrate, which causes the liquid to fizz and bubble.
Scientific enquiry
In pairs students ask and answer:
- What did you like most about this activity?
- What did you notice?
- What would you do differently the next time?
- What did you learn from this?
Maunga Puia II

This is a fun, colourful and messy science activity, that will take two lessons to complete – one to make the frozen volcanoes, and the other to make it erupt.
What you need
- Baking soda
- Water
- Vinegar
- Food colouring
- Small bowl
- Plastic wrap (e.g. Gladwrap)
- Golf balls (or other small balls that will sink)
- Freezer
What you do
- Place a golf ball in the bottom of each small bowl. Line each bowl with plastic wrap so that the golf ball is underneath and the plastic comes up over the sides.
- Next, fill the bowls with a mixture of water, baking soda and food colouring – 1 part baking soda 2 parts water and a few drops of food coloring.
Make sure you pour enough of the mixture in so that it covers the ball or you'll end up with a hole through the middle of your ice volcano.
- Once they are frozen, tip them out of the bowls and let them thaw a little. Then pull off the plastic wrap and remove the golf ball.
- Add a squirt of vinegar into the volcano’s crater and watch it erupt.
- This link shows the steps – http://www.readingconfetti.com/2013/08/ice-volcanoes.html]
Scientific enquiry
In pairs students ask and answer:
- What did you like most about this activity?
- What did you notice?
- What would you do differently the next time?
- What did you learn from this?
Maunga Puia III

What you need
- Measuring cup
- Tall glass
- White vinegar
- Baking soda
- Glow in the dark/fluorescent red and yellow paint
- Tray to put the ‘volcano’ on
- Dishwash liquid (optional)
What you do
- Put ½ cup of baking soda into a tall glass.
- Put 1 teaspoon each of red and yellow glow in the dark paint with ½ cup white vinegar.
- In a dark place add the vinegar mixture to the glass and watch it erupt!
- Add a squirt of dish-wash liquid to make the explosion move slower and last longer.
Scientific enquiry
In pairs students ask and answer:
- What did you like most about this activity?
- What did you notice?
- What would you do differently the next time?
- What did you learn from this?
Possible Assessment Opportunities
Students can:
- Recount the steps involved in the three experiments and describe the outcomes.
- Share their scientific ideas about the experiments.
Akoranga 5
Maunga Puia

Purpose
To learn some facts about volcanoes, and use art and technology to help us understand the things we discover.
Learning Intention
Students are learning:
- Some facts about volcanoes.
- To follow simple instructions to make a Lava Mug Cake.
- To use art to express their ideas about volcanoes.
What You Do
- Talk about volcanoes. Find out what your students know already.
Ask:
– Do they know of any volcanoes in Aotearoa?
– Where else in the world are there volcanoes?
– What is lava?
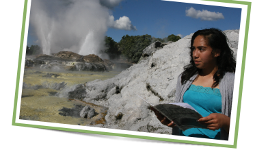
- Show your students video clips and photographs of lava and discuss how powerful, dangerous and destructive lava can be.
This link to Volcanoes National Park website has videos:
https://www.nps.gov/havo/learn/photosmultimedia/videos.htm
Or Google, “volcano erupting”, for great images to share with students.
Keke Totorewa
Get out the aprons and make these quick and easy Chocolate Lava Mug Cakes. The cakes are baked in the microwave and take 5 minutes to make and bake.
They are big enough for two people to share.
What you need
- ¼ cup flour
- 2 tablespoons sugar
- 1 tablespoons cocoa powder
- ¼ teaspoon baking powder
- Pinch of salt
- 1 tablespoon melted butter
- 2 tablespoons milk
- 1 egg
- ½ teaspoon vanilla extract
- 25 grams dark chocolate, broken into four pieces
- 1 tablespoon water
- Microwave
What you do
- In a microwave-safe mug, use a fork to mix the flour, sugar, cocoa powder, baking powder and salt until combined.
- Add the melted butter, milk, egg and vanilla. Mix well to combine.
- Place the 4 chocolate pieces on the middle of the mixture.
- Drizzle the water on top of the batter.
- Cook in microwave for 1 minute and 20 seconds or until the cake rises to the top. The edges will look cooked, but the centre should still be slightly sticky when touched.
- If it looks raw give it another 5–10 seconds in the microwave.
- Let it cool for about 5 minutes. You can tip it onto a plate and share it, or eat it straight from the mug.
Note
A short mug with a wide mouth works best for this recipe, or you could use a small bowl.
Instead of a microwave you could bake these in the oven at 200°Celcius for 10–15 minutes.
Maunga Puia – Artwork

This is an art activity where the students ‘paint’ an erupting volcano.
What you need
- A3 white art paper
- Black and white acrylic paint
- Paintbrush
- Red and yellow watercolour paint
- Straw
- Plastic spoon or dropper
What you do
- Give each student a sheet of A3 art paper. Have the students draw a big volcano shape (flat topped cone) on their paper.
- Give them black and white paint to mix into dark mountainous shades for painting the volcano. Use acrylics so the paint will dry quickly.
- Then give students some red and yellow watercolour paints. Students mix paints to make lava colours. Using a spoon or dropper students put a few drops of watercolour paint at the top of their volcano.
- Using a straw, students blow the watercolour paint to create lava erupting from the top of the volcano.
- Once the paint is dry, conduct an art appreciation session about work that students are happy to share with the class. Encourage the students to give positive feedback.
- You can ask:
– What do you like most about Pere’s picture?
– How does this picture make you feel?
– What about it reminds you of a volcano?
Possible Assessment Opportunities
Students can:
- Work cooperatively to make and bake a Lava Mug Cake.
- Create an artwork that depicts an erupting volcano.
- To present their artwork to peers.
- To give and receive comments about artwork (their own and their peers).


