
Pōpō!: Level 1

Te Pouahaokai
This unit focuses on the first stanza of the oriori Pōpō!. It links to the Reo Māori, Tikanga ā-Iwi, Hangarau and Ngā Toi learning areas, supporting teaching and learning at level 1 of Te Marautanga o Aotearoa.
The activities focus on creating oral language opportunities – both formal and informal.
Pōpō!
Nā Enoka Te Pakaru i tito
Pōpō! E tangi ana Tama ki te kai māna!
Waiho me tiki ake ki te Pouahaokai,
Hei ā mai te pakake ki uta rā
Hei waiū mō Tama!
Kia mauria mai e tō tupuna, e Uenuku!
Whakarongo! Ko te kūmara ko Parinuiterā.
Ka hikimata te tapuae o Tangaroa,
Ka whaimata te tapuae o Tangaroa.
Tangaroa! Ka haruru!
Akoranga 1
Whakarongo!

Purpose
To learn the first stanza of the oriori Pōpō!
Learning Intentions
Students/we are learning to:
- Recite the first stanza of Pōpō! and pronounce the words correctly.
- Identify some key words and ideas in the first stanza.
- Talk about their own feelings and experiences.
- Retell some of the stories in the first stanza.
What You Need
- Pōpō! – animated mōteatea and audio track
- Data projector or interactive whiteboard
- Cushions or pillows (optional)
- Copies of TM1-POUAHAOKAI-A1.PDF, TM2-POUAHAOKAI-A1.PDF (one per student)
Watch the video for the waiata Pōpō
What You Do
Akoranga ā-Akomanga.
(Suggestion – teach first thing in the morning.)
- Ask your students to find a space where they are comfortable and close their eyes. (They could lie down). Play the audio track Pōpō! and listen to the entire mōteatea.
- After listening ask these questions:
What feelings did you get when you listened to this mōteatea?
Possible answers: I felt bored; it was long; they sounded like old people.
Did anything happen to you when you were listening?
Possible answers: I fell asleep; it made me feel tired; it made me hungry.
- Explain:
Pōpō! was composed a long time ago by Enoka Te Pakaru from Te Aitanga ā-Māhaki. It is an oriori which is sung to soothe a crying baby or to make them fall asleep. It is very long and has lots of different stories about how the kūmara came to Tūranganui-a-Kiwa.
-
Listen to Pōpō! again, but this time show the pictures that go with the text.
Listen to just the first stanza. You could further explain:
This is the first part of the oriori, Pōpō! The composer is trying to soothe the hungry baby, Tama, by telling amazing stories about food – about the magic bird Pouahaokai, about the atua Uenuku and about tupuna who returned far across the sea to Parinuitera to fetch the kūmara.
- Ask the students, “What words do you remember hearing?” and record their answers.
Possible list:
pōpō
Tama
Tangaroa
kūmara
tupuna
haruru
pakake
Uenuku
waiū
Explain any words that you think might be unfamiliar. E.g.
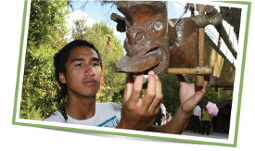
Pouahaokai – a magical bird who was a kaitiaki of the people.
Parinuiterā – a place in Hawaiki where the kūmara came from.
-
Ask your students to choose at least two words from the list and make up a sentence using the words. Share the sentence with a friend, small group or whole class.
You could make this a competitive activity where they score points for sentences that nobody else has thought of. - The next task is to learn the first stanza of Pōpō. You use either of these to help with teaching and learning:
– Replay the audio or audio visual recording of Pōpō! to your students.
– You could read the first stanza of Pōpō! with your students.
- As a group recite the lines of the first stanza. Learn line by line, adding a new line when you are confident that the group has embedded the previous lines.
Possible Assessment Opportunities
- Print copymasters 1 and 2. Cut out elements from copymaster 2. Using copymaster 1 as a background, students choose cut-out elements and glue them to the background. They then tell their own story about what is going on in their picture. This could be shared with the teacher, or a partner.
- Students could draw their own picture, that would include at least two key elements from the first stanza, and tell a partner, teacher or class what their picture is about.
- As an extension, students could then explain their partner’s picture to another person, the teacher or group.
Akoranga 2
Manu Mīharo
Purpose
To learn about the Pouahaokai and its magical qualities.
Learning Intentions
Students are learning to:
- Follow instructions for making an artwork.
- Share their picture and story.
What you need
- MANU MĪHARO-TAUIRA TŌKAU.PDF – printed or glued onto card and cut out for each student
- Copy of the story, TE POUAHAOKAI-KŌRERO-1.PDF
- Things for decorating the manu mīharo
- Glue
- Felts pens or coloured pencils
What you do
- Tell the story of Te Pouahaokai as a way of introducing the concept of magnificent, magical creatures. (Use TE POUAHAOKAI-KŌRERO-1.PDF)
-
Ask questions to generate discussion:
How do you feel, or what do you think, about the Pouahaokai and how it helped the people?
What were the special things that the Pouahaokai did?
What other kaitiaki do you know of?
Are there other magical creatures that you know about?
- Then ask students to imagine their own magical bird. Use these prompts to get them to think about what it would be like:
What does it look like?
What does it sound like?
What magical things can it do?
What special powers does it have?
What are the ways that your magical bird can help you?
How do you communicate with your magical bird?
Where does it live?
- Get the students to share their ideas either in a small group or with the whole class.
Manu Mīharo Art Activity
Part 1 – decorating the bird
- Using the Manu Mīharo templates students each decorate a bird – their Manu Mīharo. Get them to think about how the decorations might be connected to their bird’s special powers.
- Have the children describe their birds either to a friend, in a small group or the whole class. Encourage students to ask questions of their partners as prompts e.g.
– How does your Manu Mīharo help you?
– What special powers does your bird have?
– What sounds does it make?
– Where does it live?
Part 2 – making the wings
- After thinking about their Manu Mīharo, give each student a piece of A4 paper. Ask the students to draw their Manu Mīharo using one of their special powers e.g. carrying a person on its back; talking with people; flying to the moon. Ask them to write a sentence describing their picture.
- Students share their picture and words.
- Students then fold their picture, concertina style, and insert into the pre-cut slot to become wings for their Manu Mīharo.
- Hang the completed Manu from a hanger, line or branch in the classroom.
Possible Assessment Opportunities
Students can:
- Students can listen and respond to the story of the Pouahaokai.
- Talk about their manu mīharo and describe its special features.
Akoranga 3
Te Pouahaokai – a play
Purpose
To learn about Te Pouahaokai by listening to a play.
Learning Intentions
Students/we are learning to:
- Listen to a play.
- Work cooperatively with others to perform a play.
What you need
- Copy or copies of the play – TE POUAHAOKAI-WHAKAARI.PDF
- Audio reading of the play
What you do
This is a short play based on the story of the Pouahaokai. You can adapt it to suit your students. It could be something that the whole class does together or that they perform in smaller groups. You could invite older students to work with your younger students.
You can extend the activity and create costumes and a set. You could invite whānau to come and see play. It could be performed alongside the hākari at the end of this unit.
- Listen to the play.
Extension Activity
Ko Wai Au?
- This is like the game ‘Headbands’. Students take turns at wearing a headband or Post-it note with the name of a character from the play, making sure they can’t see the name but the rest of the class can.
- The student then asks questions to work out which character they are. The other students can only give a ‘yes’ or ‘no’ answer. When the student has guessed who they are, another student has a turn.
Here are some helpful questions:
– He wāhine/tāne ahau?
– He tamaiti ahau?
– He kararehe au?
– He nui au?
– He atua au?
Possible Assessment Opportunities
Students can:
- Listen and respond to the play about Te Pouahaokai.
- Name the characters in the play.
- Participate in a play reading.
Akoranga 4
Te Reo o te Whare Kai

Purpose
To learn some of the formal language used in the whare kai.
Learning Intentions
Students/we are learning to:
- Recite the karakia.
- Recite the pao wharekai
- Recite the hari kai.
The whare kai offers opportunities to practise formal language. This type of language can be rote learnt (te ako ā-kākā, te tāruarua).
This activity is excellent as a scaffolded learning approach. Initially students learn and recite as a whole group, and as their confidence increases they can perform in smaller groups and eventually as individuals. Practise whenever there are shared kai opportunities.
Learn these three short texts line by line, as a class. Once the students are confident get them to practise in smaller groups, and call on them to perform for occasions as they arise (either in small groups, pairs or individually).
He karakia mō te kai
Karakia kai acknowledge where the food has come from, as well as expressing thanks.
Auraki mai ngā kono
I waenganui i a tātou
He kai māku
He kai māu
He kai māna
Tīhei mauri ora
He hari kai
Hari kai is a song to entertain visitors while the food is set out.
Whāngaihia te tinana
Ki ngā kono ō a rātou mā
Kia tū te oranga e
Kainga te tahua a Rongo
Rāua ko Haumia
E kai
E kai
E kai hai!
He pao kai
Pao are short, impromptu, topical songs to welcome guests into the whare kai.
Tomo mai, tomo mai
Ki te whare o Rongo e
Ki te kai, ki te kai
Kua hora nei e …
Extension Activity
Organise a shared kai. Split the class into groups to perform the karakia kai, hari kai and pao kai – pao (a group of girls), karakia kai (a group of boys) and hari kai (a mixed group).
Possible Assessment Opportunity
Students can:
- Recite the pao kai, the karakia and the hari kai.
Akoranga 5
Te Mahi Hāngi

Purpose
To prepare and cook a hāngi using the tools of today.
Learning Intentions
Students/we are learning to:
- Follow instructions to prepare a hāngi.
- Learn the names for the different foods in the hāngi.
What you need
- Potatoes
- Kūmara
- Pumpkin
- Pork pieces
- Chicken pieces
- Cabbage, Watercress
- ¼ cup water
- Oven
- Chopping board
- Foil baking dishes
- Tin foil
What you do
In preparation you will need to chop the vegetables and meat into manageable portions, or invite parents or tuakana along to help out with these things.
- Ask students what they know about hāngi.
– Where have you had hāngi before?
– Where was the hāngi cooked?
– What foods were in the hāngi that you had?
– Who prepared the hāngi?
– Was it for a special occasion? (A wedding, a birthday, a tangi, a fundraiser?)
- Explain that you will make a hāngi together, but using a regular oven. This hāngi is simple to prepare and easy to cook.
- Organize students into small groups or pairs. Each group will need:
– A tinfoil baking dish
– Some tinfoil
– Chopped vegetables
– Two pieces of meat (chicken or pork)
– Some watercress and/or cabbage
– Some water.
- Give the following instructions.
– Set the oven to 180°Celcius.
– Wash the watercress and/or cabbage (or you could have prewashed these).
– Layer the kai in the trays, following the traditionally layering – meat on the bottom layer, then vegetables with cabbage and watercress on the top.
– Sprinkle with salt and pepper and a ¼ cup of water. (Teacher, tuakana or parent help with the salt and pepper!)
– Cover with tinfoil.
– Put into the oven for a least an hour (depending on the size of the portions).
– Cook and eat!
Possible Assessment Opportunities
- The hāngi – preparation, cooking and eating – presents plenty of opportunity for informal discussion with peers.
- In pairs, get students to take photos of the hāngi for presentation as a slideshow or a sequenced event in their portfolios e.g. kai before preparation, hāngi packs before and after cooking and eating the hāngi.
- Students could practise their karakia kai, hari kai and pao kai at this hākari too.


