Pōpō!: Level 4
Pourangahua
This unit uses the sixth and seventh stanzas of the oriori Pōpō! as a focus for learning, and gaining a deeper understanding of the text. It links to the Reo Māori, Tikanga ā-Iwi and Hangarau learning areas, supporting teaching and learning at level 4 of Te Marautanga o Aotearoa.
The activities have been designed to create oral language opportunities – both formal and informal.
Pōpō!
Nā Enoka Te Pakaru i tito
(the sixth and seventh stanzas)
Ko Hākirirangi ka ū kei uta
Te kōwhai ka ngaora, ka ringitia te kete
Ko Manawarū, ko Āraiteuru
Ka kitea e te tini, e te mano!
Ko Makauri anake i mahue atu i waho i Tokaahuru
Ko te peka i rere mai ki uta rā hei kura mō Māhaki
Ko Mangamoteo, ko Uetanguru
Ko te kōiwi ko Rongorapua
Waiho me tiki ake ki te kūmara i a Rangi!
Ko Pekehawani ka noho i a Rēhua
Ko Rūhīterangi ka tau kei raro:
Te ngahuru tikotikoiere
Ko Poutūterangi!
Te mātahi o te tau, te putunga o te hinu, e tama e!
Waiho me tiki ake ki te kūumara i a Rangi!
Ko Pekehaāwani ka noho i a Rēehua
Ko Rūhīterangi ka tau kei raro:
Te ngahuru tikotiko-iere
Ko Poutūterangi!
Te mātahi o te tau, te putunga o te hinu, e tama e!
Akoranga 1
Whakarongo, Kōrero
Purpose
To introduce, listen to, and discuss the mōteatea Pōpō! with students.
Learning Intentions
Students are learning:
- The oriori Pōpō!
- Some of the stories that are embedded in Pōpō!.
What You Need
- Pōpō! – the animated mōteatea and audio track
- Data projector or interactive whiteboard
- Copies of lines – RĀRANGI KUPU-A1.PDF
- Copies of the oriori – PŌPŌ-RAUPAPAHIA-A1.PDF
- Copies of WHITI+KUPU-A1.PDF
Watch the video for the waiata Pōpō
What You Do
Akoranga ā-Akomanga
Teach first thing in the morning. The following material is designed to be spread over a number of sessions – break it up where it suits you and your students.
Listening to Pōpō!
- Ask your students to close their eyes. Play the audio track and listen to the entire mōteatea.
- After listening to Pōpō! ask these questions:
What feelings did you get when you listened to this mōteatea?
Did anything happen to you when you were listening?
- Talk about the mōteatea. Explain:
Pōpō! is a Te Aitanga-a-Māhaki oriori that was composed at least 400 years ago by Enoka Te Pakaru. This ancient and beautiful text is still being performed and is widely known, or known of.
Oriori were composed to impart important tribal knowledge to babies and children so that from a very young age they heard whakapapa, tribal histories, important tūpuna and origin stories. By repetition of these oriori over their early years, children grew up strong in the knowledge of who they were and where they came from.
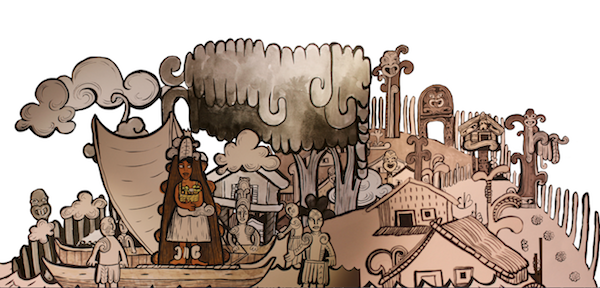
Pōpō! retells many stories about how the kūmara came to the Tūranganui-a-Kiwa region. The text might touch only briefly on the stories, or parts of them, in anticipation that with time and curiosity the child will discover more.
- Play Pōpō! again, but this time show the pictures that go with the text. Between stanzas brainstorm the key words they remember hearing. Record the words. (Or you could use these lists – RĀRANGI KUPU-A1.PDF.)
- Using the word lists, recap the main ideas and story lines with the class.
Stanza 1
Establishes that this is an oriori, to soothe the baby, Tama. It introduces Te Pouahaokai, a magical bird that is a kaitiaki of the people. It refers to Uenuku, a progenitor of the kūmara, and of the journey by Pourangahua across the oceans to retrieve the kūmara from Parinuiterā.
Stanza 2
Provides the whakapapa of Uru and Ngangana. It then introduces the original form of pounamu, Te Whatu o Poutini, and Hinetuahōanga who was the sandstone maiden (sandstone was used to shape and carve pounamu). There is a story that Ngahue fled Hawaiki with his pet fish called Poutini. Hinetuahōanga had been bothering the fish and she chased them to Mayor Island in the Bay of Plenty. Ngahue and Poutini escaped to the West Coast of the South Island, where Ngahue found a safe place in the Arahura River for Poutini to live in peace. The West Coast has since been known as Te Tai Poutini.
Stanza 3
Introduces the story of Pani and her role as kaitiaki and progenitor of the kūmara. Māuiwharekino was given the kūmara by Uenuku. Māui descended from the heavens and when he returned to his wife she became pregnant with the kūmara. When her people were hungry and food supplies were low, she would take herself to Te Wai o Monaariki, and give birth to kūmara. She would fill her kete and return to the pā. One time, she was followed and the people of the village learned her secret. From then on, the people shared in the responsibility of looking after the kūmara.
Stanza 4
Introduces the second part of the oriori, which is mostly concerned with how Māori brought the kūmara to Aotearoa, and the rituals around its cultivation and harvest. The first part of the oriori was more focused on its origin.
When the kūmara arrived in Gisborne an altar was established where planting rituals were carried out. Special trees were felled to make posts for the altar. Snares were built to snare bad spirits (similar to those used for catching birds).
The text talks of people, place, taonga and atua:
– Tūpuna – including ’Turiwhatu (the sister-in-law of Pourangahua; Waiho (Waio, from the same family as Te Aotū and Te Aohore); Kanoa (brother-in-law of Pourangahua).
– Rākeiora, a tohunga reknowned for his knowledge of the kūmara;
– Tūmatauenga and Rongomaraeroa – who are in constant opposition, existing to maintain a balance in life.
– “te ahi rara o Rongomaraeroa” – all the different hapū in the region.
– Te Rangikaupapa – a mythical cloak associated with warfare.
– Matuatonga – both an ancestor who came aboard the Takitimu and the name of a body belt in which the kūmara was brought to Aotearoa.
Stanza 5
This part begins with reference to the Huripūreiata – the event where Ruatapu, after being insulted by Kahutiaterangi, caused his waka to upturn while he was fishing. Kahutiaterangi, called to Paikea – the great whale – and rode on its back, arriving at Whangarā-mai-tawhiti.
Manini-kura and Manini-aro are said to have been kūmara gardening tools that Pourangahua brought with him from Hawaiki. It is also said that the last lines of this stanza are from a paddlers’ song, sung originally by the paddlers aboard the Takitimu.
Stanza 6
Hākirirangi was a woman aboard Horouta who brought the kūmara to Tūranga. She was an expert in the lore of the kūmara and knew that it should be planted with the blossoming of the kōwhai in Spring. Manawarū and Āraiteuru were the names of Hākirirangi’s first kūmara plantations.
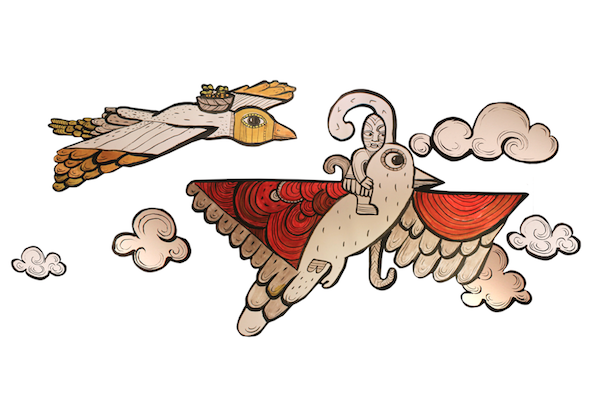
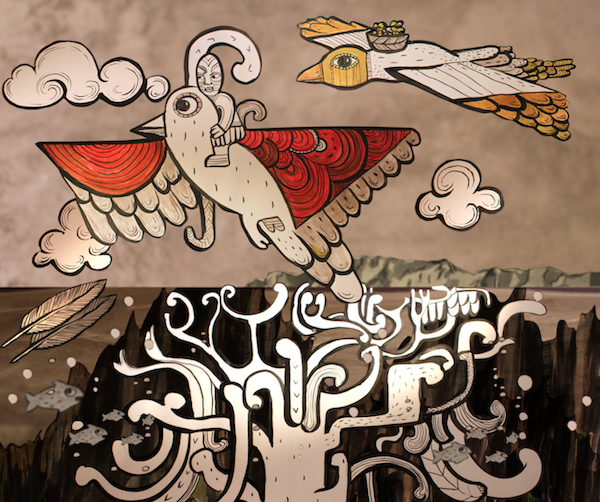
Pourangahua returned from Hawaiki with the kūmara aboard a giant bird. When he was above the coast of Tūranga, he plucked some feathers from the bird and dropped them into the sea where they grew into a kahikatea tree named Makauri – Tokaahuru is the name of the reef where Makauri grew. A branch of the tree broke off and washed ashore where it became the forests that sustained Māhaki.
Mangamoteo and Uetanguru are rivers in the Tūranga area.
Stanza 7
The final stanza speaks of harvest time and things that mark the end of the year – stars, bounteous harvests, the gathering and storing of food for winter.
Learning the oriori
Ako ā-kākā
- The next task is to learn Pōpō!. You could choose to learn these as a class or in small groups i.e. a stanza each. Learn each stanza before moving to the next. Retell the main ideas (above) of each stanza as an introduction. You could also use the images from the Pōpō! digital resource.
- Practise regularly to embed the oriori.
Supporting activities
Use these to help reinforce learning.
- Using the key word lists get the students to write the words onto cards, shuffle them and then try and order them – firstly, into the correct stanza, then in the order that they occur in the texts.
- Cut the oriori into lines of texts that the students could then sequence. Give each group a different set of lines. Groups present their lines back to the whole class. (Use 4-RĀRANGI KUPU-A1.PDF.)
- Ask the students to draw their favourite part of the oriori. Ask them to share their picture with a friend and tell them about their picture. Friends respond to their presentation and artwork.
- In groups, students are given a stanza 1–7 and the corresponding word list. Get them to research a part (or parts) further and give an oral presentation of their findings to the class – the word list might help focus research. (Use 4-WHITI+KUPU-A1.PDF.)
Possible Assessment Opportunities
- Practising and performing Pōpō!.
- Listening and following along to Pōpō!.
- Sharing thoughts and feelings about Pōpō!.
- Listening for and sharing key ideas that are embedded in Pōpō!.
- Sharing their own work and responding to the work of others.
- Working cooperatively in a group – sharing views and listening to others.
Akoranga 2
Pourangahua
Purpose
To read, create and/or stage a play based on the story of Pourangahua and the Great Birds of Ruakapanga.
Learning Intentions
Students are learning:
- The story of Pourangahua and the Great Birds of Ruakapanga.
- To follow a script.
- To read a script with expression.
- To work cooperatively to create a short skit.
- To work cooperatively with limited time and resources to stage the play, Pourangahua and the Great Birds of Ruakapanga.
What You Need
- 1 copy per student of the play, Pourangahua me ngā Manu Nunui a Ruakapanga
- paper and pens
- roll of brown paper
- black crayons
- tape
- scissors
What You Do
This is a play about the great birds of Ruakapanga and how they brought Pourangahua and the kūmara from Hawaiki to Aotearoa. Pourangahua is often referred to in this oriori. In stanza 1 he returns to Hawaiki, to Parinuiterā, to get the kūmara. In stanza 6, he is returning with kūmara and more of his story is revealed. This play is about his journey home.
Reading the play
- Read the play as a class. Share these ‘rules’ for reading a script.
Some guidelines
- Follow the script, even if it’s not your turn to speak.
- No prompting – you should know where we are up to in the play if you are following along.
- But … if you have read your part and you think the next person has lost their place … repeat your line again, hopefully this will prompt them.
- Think about your character and what is going on in the story and use expression in your voice.
- If you make a mistake, don’t worry, just take a breath and repeat the line.
- After reading the play, students are to work in groups and recreate their own skit or short play based on a section of the Pourangahua story. Give them a time limit –15 minutes maximum. Groups perform their skit to the whole class. Rest of class gives feedback on the skit – what they liked and why; favourite character and why etc.
Stage challenge
- Organise the class into two groups. Give them a 1-hour “challenge” to stage the play.
- Give each group the following:
– 1 copy per student of the script
– A length of brown paper (up to 10 metres)
– Some tape
– Scissors
– Black crayon
– A ball of string
And these instructions:
– You are to stage the play Pourangahua and the Great Birds of Ruakapanga.
– You have 1 hour before you are to perform the play to the other group.
– You have these things to help you for the set, costumes, and props (see list above).
– You must use the script.
– You need to quickly organise roles – actors, director/s, production crew (e.g. costume and set designers).
Optional
Make it into a competition – invite another class, teacher or the tumuaki to judge the performances. You could have categories i.e. best actor/actress; best costumes; best set etc.
Extension activities
Character traits
- Read the play. Discuss the different characters. Make a character list.
- Choose one character and do a character analysis together. Encourage students to consider clues in the play, as well as their own thoughts and ideas, e.g.
RUAKAPANGA
| External traits (what you see on the outside) | Internal traits |
| old | kind |
| strong | hospitable |
| kind eyes | friendly |
| generous | |
| trusting | |
| vengeful |
- Organise the class into pairs or threes and ask each group to choose a character. Get the students to think about, discuss and list the traits (both internal and external) of their character.
- From what they know about their character they create a short monologue (based on the Pourangahua story) from that character’s perspective. E.g. Pourangahua’s wife could be talking about how long Pourangahua is away; Ruakapanga could be talking about what a great guy Pourangahua is (before the birds get back!).
- Students perform the monologues to the class.
Possible Assessment Opportunities
- Students read the play using appropriate intonation and expression.
- Students make up a short play or skit about the Pourangahua story.
- Students stage the play of Pourangahua and the Great Birds of Ruakapanga – taking on roles of direction, production and acting.
- Students deliver their lines clearly and expressively.
- Students work cooperatively together to stage a play.
Akoranga 3
He Karakia Manu
Purpose
Students are learning about karakia used in association with traditional Māori kites.
Learning Intentions
Students are learning:
- A story about traditional Māori kites.
- To consider the purposes of different karakia.
- To share their ideas about karakia.
- To work with a partner to compose a karakia manu.
What You Need
- Internet connection
- Paper and pens
- He tauira o MANU AUTE-A3.PDF
Manu Tukutuku
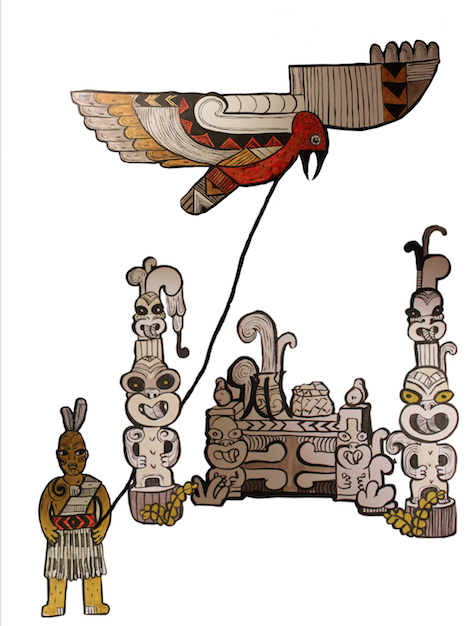
Māori kites are known as manu tukutuku or manu aute. Manu is the word for bird and kite, and tukutuku refers to the winding out of the line as the kite climbs.
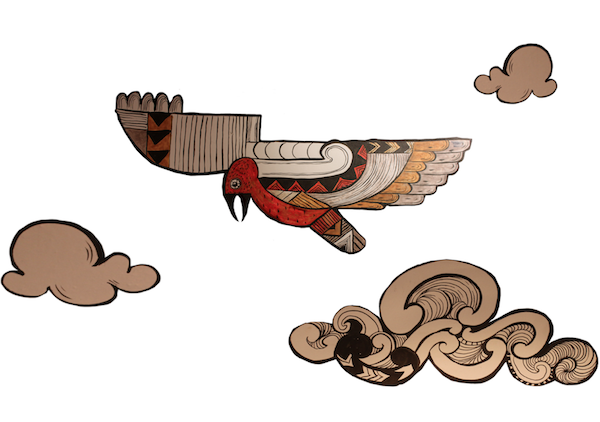
Manu aute is a general name for Māori kites, but it specifically refers to those covered with the bark of the aute plant. Manu aute were made in a variety of forms, but tended to be in the shape of a bird.
Kites were often seen as connectors of the heavens and the earth, but they were also a means of communication for instance one village would often signal to the next that a meeting was needed by flying a kite.
Legends tell of Tawhaki trying vainly to follow Tangotango to heaven on a kite; of Rahi using a kite in pursuit of Te Ara and of Maui using kites to fly over landforms.
The Maori kite often had a religious significance. Māui compelled the winds with his kite, and in the hands of a powerful tohunga the manu aute could do wonderful things. It could tell whether it would be wise for a war-party to attack, as a means of seeking land for settlement and for communication between tribes.
It was customary for the kite-flyer to chant a karakia as the kite went up. These karakia were called turu manu (kite charm), and were believed to make the kite fly properly.
Here is one recorded by Elsdon Best at Te Teko by Hāmiora Pio of Ngāti Awa.
Piki mai, piki mai
Te mata tihi o te rangi,
Te mata taha o te rangi,
E ko koe
Kai whaunumia e koe
Ki te kawe tuawhitu
Ki te kawe tuawaru
Tahi te nuku, tahi te rangi,
Ko te kawa i hea?
Ko te kawa i taumata āio
I taumata raha
Kawa i te rangi—e
Pikitia e koe ki tō matua, ki a Hākuai
Ki tō tupuna, kia Rehua i te rangi—e.”
Links
Te Ara has extensive information on Manu Aute.
http://www.teara.govt.nz/mi/photograph/5285/aute
Te manu tukutuku, the Māori kite/Christchurch Libraries
http://my.christchurchcitylibraries.com/maori-te-manu-tukutuku/
New Zealand in History – Traditional Māori Sports & Games
http://history-nz.org/kite.html
What You Do
- Introduce the kaupapa of manu tukutuku to the students. Read this short piece from Te Ara, about manu tukutuku and karakia.
Ki ētahi iwi, ko te piki a Tāwhaki ki te toi o ngā rangi ki te tiki i ngā kete o te wānanga, mā runga manu aute tūturu nei (arā, he mea hanga ki te hiako o te aute). Ka topa ia ki te rangi me te karakia haere anō, engari ka tono tana hoariri, a Tamaiwaho, i tana kaiāwhina, i a Hākuai, kia tuku karakia e pakaru ai te manu aute a Tāwhaki. Ka utua e Tāwhaki tērā karakia ki tāna ake hei whakarewa anō i tana manu ki runga. Engari ka karakia anō ko Hākuwai, ka taka anō ko Tāwhaki. Heoi anō, ka roa ā, ka kake haere anō a Tāwhaki i te maunga, ka patua e ia a Tamaiwaho.[2]
URL: http://www.TeAra.govt.nz/en/kites-and-manu-tukutuku/page-1
- Talk with the students about karakia and its purposes in the time of our tūpuna and what uses there might be for manu tukutuku and karakia manu today.
-
Brainstorm as a class:
Who/what are karakia for?
E.g. to name a new baby; to bless a marriage; to ensure a win at a sports competition; to bring peace to the land and its people; to celebrate Matariki. - Discuss which types of karakia might be appropriate for the occasions listed, and look critically at some of the karakia students already know.
- Using a karakia that the class knows, students are to identify its various parts, focusing on the type of language used e.g. descriptive language and instructional language.
-
In pairs students compose their own karakia manu. (They will be making their own manu tukutuku.)
Encourage students to use at least 5 descriptive phrases and/or similes in their karakia, e.g. ‘ānō nei he whetū e kanapa mai ana’. - The karakia they compose can be recited by each pair before they start making their kites, when they complete their kites and when they present the kites to the classroom/kura as a whole.
- Share karakia with class or peers.
Possible Assessment Opportunities
- Students learn karakia specifically related to Manu Tukutuku.
- Students compose and recite their own karakia for a Manu Tukutuku they will design.
- Students share their karakia with peers.
Akoranga 4
Construct a Manu Tukutuku
Purpose
Students are learning about traditional Māori kites and their construction.
Learning Intentions
Students are learning:
- To research information about traditional Māori kites.
- To work cooperatively to design and construct a traditional Māori kite.
- To explain to peers (or others in the school), the methods they used to construct and fly their kite.
What You Need
- Internet connection
- Paper and pens
- Kite building materials – kākaho, raupō, harakeke, string (alternatively – hot glue gun, tape, newspaper, brown paper etc)
- Bob Maysmor’s book, Te Manu Tukutuku, the Māori Kite (Steele Roberts, 2001)
What You Do
There are numerous websites with information, images, videos and instructions on how to make a traditional manu tukutuku.
Some schools have recorded their manu tukutuku projects. Although in English, these are still a useful resource.
– Ruapehu REAP – How to make Manu Tukutuku
– Room 3’s Manu Tukutuku
- To begin the lesson ask for a volunteer to say the karakia they composed in the previous lesson.
- In pairs (the same pairs that composed karakia in previous lesson), get students to:
– Look at images of different types of traditional Māori kites and talk about the components, scale, range of shapes, and details.
– Investigate the materials used and how kites were used to convey different ideas.
– Research how customary kites were constructed and flown, why they were made, and what significance they had for Māori.
– Brainstorm ideas they would like their kite to convey and make drawings of possible approaches, with notes about suitable materials, construction methods, and other details.
- Discuss materials that were used in the past, that are still available today, e.g. kākaho for the frame, raupō leaves sewn together for the skin, and harakeke strips knotted together to make a string for lashing and flying.
- Use customary materials such as raupō, harakeke, kākaho, mānuka, and feathers. Where this is not possible, select substitutes such as string, paper, plastic and bamboo, or make rods from rolled newspaper.
- Possible kite forms the students could consider include the manu taratahi or the one-point kite, named after the plume that projects out of the top (see link below).
- The construction methods and materials will depend on the type of kite the students choose to make.
Bob Maysmor’s book, Te Manu Tukutuku, the Māori Kite (Steele Roberts, 2001) is a great resource, in particular refer to:
– The manu taratahi (page 104).
– Images of the horewai (page 41).
– The manu patiki (page 44.)
– Bird man kite (pages 42 and 43).
- Once they select a type of kite to make, the students will need to:
– Draw its shape, adding notes on materials, approaches to construction, and any details they will include on their kite.
– Gather materials, trial methods of lashing, make strings etc.
– Make their kite and trial its flying ability – experiment by holding the middle strut and tossing it into a glide path. If the kite glides in a reasonably straight line and floats, then the kite is ready for its string. If not, work out where the kite is imbalanced and make minor adjustments to it.
- Once the student has balanced the kite, tie the lines (bridle and flying) and take the kite outside for final flight. (Remind them to say the karakia they composed for their Manu Tukutuku.)
- The flying of the kite could be used as a starting point for looking at the movements associated with flight, and dance activities could centre on this.
Manu Taratahi
What You Need
- Raupō
- Kākaho – some with feathery tops intact, some without
- Strips of softened harakeke or string/cord
Instructions
This link to Te Ara provides diagrams and instructions for a manu taratahi.
http://www.teara.govt.nz/en/diagram/5294/how-to-make-a-manu-taratahi
Possible Assessment Opportunities
- Students recite karakia they have composed for their Manu Tukutuku at appropriate times during the research, construction, and flight.
- Students talk about their experience of making a kite; how they managed the materials and construction techniques. They talk about the ideas their own and others' kites convey. They could discuss the reasons people have made kites over time and in different societies.
- Students show their kites to children in junior classes and explain how natural materials were traditionally used to construct kites.
- The students can use peer tutoring – tuakana/teina – to help younger students construct a kite.
[1] Journal of the Polynesian Society, Elsdon Best
TE MANU AUTE. From Hamiora Pio of Ngati-Awa kei Te Teko.
[2] Bob Maysmor. 'Kites and manu tukutuku - Manu tukutuku – Māori kites', Te Ara - the Encyclopedia of New Zealand, updated 13-Jul-12. (Translated by Hēni Jacob.)
URL: http://www.TeAra.govt.nz/en/kites-and-manu-tukutuku/page-1
